Work In Progress: Raine, Update 4
The next step in the process is the transfer to the final paper. Rather than blacken the back of the drawing I elected to blacken one side of a separate sheet of tracing paper and use it to do the transfer. There are instances where the line work on the front side is not clearly visible when the back is blackened, and since accuracy is necessary, I didn’t want to take a chance on being able to follow the line work, I used a separate sheet. I also didn’t want to go over existing line work just to make it darker. In case it became necessary to re-draw the head, I didn’t want to make unnecessary and possibly detrimental marks on a drawing. I might want to use it again in the future.
Once the sheet of tracing paper was blackened on one side with an HB pencil, I slipped it between the drawing and the Sennelier pastel paper. I then carefully went over the lines with a ball point pen. The pen had no ink in it, so no lines were made on the drawing.
The first step in the creation of this portrait was to produce a line drawing in pastel. I re-drew the lines carefully with a CO burnt sienna pastel pencil and added shading. At this stage the main shade masses are indicated generally and done lightly.
The next step is stating the darks, mid tones and lights, again in general terms. I made no attempt to fill in solidly, just lightly and generally again. This step is to just map out the tones. I kept the darks a little lighter than in the photo, and the mid tones and lights a little lighter. That would enable me to go darker on the darks and lighter on the mid tones and lights as I progressed. This gave me some leeway in both directions.
First, I placed in the lighter of the darks in the face (shadows of the eye sockets, right lower cheek and chin, inner part of the left cheek, and neck) with CO burnt sienna. Next, I used CO bister very lightly for the darks in the hair and, even more lightly, on the lower part of the right cheek, the right eye socket and on the lower neck, near the blouse.
To give some definition to the mouth, I used CO bister for the interior of the mouth.
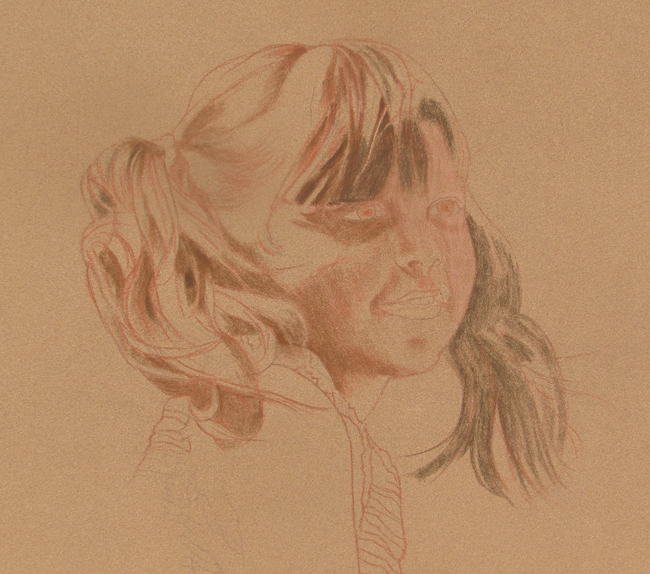
I will probably leave the remainder of the hair now until I get most or all of the face finished.
The mid tones begin at the edges of the shadows, separating the darks from the lights. I considered mid tones to be the forehead, outer part of the left cheek, upper right cheek near the nose, the nose and philtrum (area between the nose and upper lip), below the lower lip and down on to the chin, and the outer edge of the neck. For the base color of the mid tones I used FC light flesh.
The lights were done with FC ivory. Here I mapped out the far right side of Raine’s face and also the very edge of the neck just under the chin.
The lips were defined with FC medium flesh, FC dark red and FC ivory. The eyes were colored in with FC light ultramarine and FC chrome green opaque.

Now, I’ll go back to the face, re-state the darks, mid tones and lights and continue to refine the features.